
Homemade Graham Cracker Crust
Creating a Homemade Graham Cracker Crust is more than just a step in your dessert preparation; it brings warmth to the kitchen and evokes memories of cozy evenings spent with loved ones. This delightful crust, with its tantalizingly sweet flavor and crunchy texture, perfectly complements an array of fillings, from creamy cheesecakes to luscious chocolate mousse pies. The scent of freshly baked crust wafts through your home, wrapping you in nostalgia as you remember the comforting desserts shared with family during holidays and celebrations. This crust is that essential foundation that binds cherished moments together, making every bite a reminder of joy and indulgence. You’ll love how simple yet satisfying it is.
Prep Time: Ten minutes
Cook Time: Ten minutes
Total Time: Twenty minutes
Servings: Eight slices
Difficulty: Easy
Key Ingredients: Graham cracker crumbs, sugar, butter
Dietary Tags: Vegetarian, easily adaptable for gluten-free
Quick Answer: This recipe guides you in making a delicious Homemade Graham Cracker Crust in just twenty minutes, ensuring a perfect base for your favorite desserts.
Why Make This Recipe
Choosing to make your own Homemade Graham Cracker Crust is a decision rooted not only in flavor but in connection. The rich, buttery notes combined with that familiar sweetness enhance the taste of any dessert. Each morsel crumbles delightfully in your mouth, offering a crisp bite that contrasts beautifully with rich fillings. As you press the crumbly mixture into the pan, the texture transforms from loose granules to a unified crust, creating something that feels entirely your own and inherently special.
Imagine gathering with loved ones, laughter echoing through the room as you slice into a cheesecake adorned with this crust. Conversations flow, and moments of togetherness fill the space. The crust doesn’t just hold the filling; it evokes stories of holiday feasts and shared celebrations. It invites everyone to help themselves and create new memories around the table. It’s the kind of recipe you’ll come back to all year long, whether for a summer barbecue or a winter gathering.
Making a Homemade Graham Cracker Crust also gives you control over its quality and flavor. The satisfaction of knowing you crafted each component adds a satisfying layer to your dessert baking. The delightful aroma that emerges as it bakes is simply irresistible, serving as a reminder of the simple joys of cooking. You’ll find that this crust stays fresh for days, allowing you to savor each creation. Embrace the ease and elevate your desserts with this straightforward yet exceptional recipe.
How to Make Homemade Graham Cracker Crust
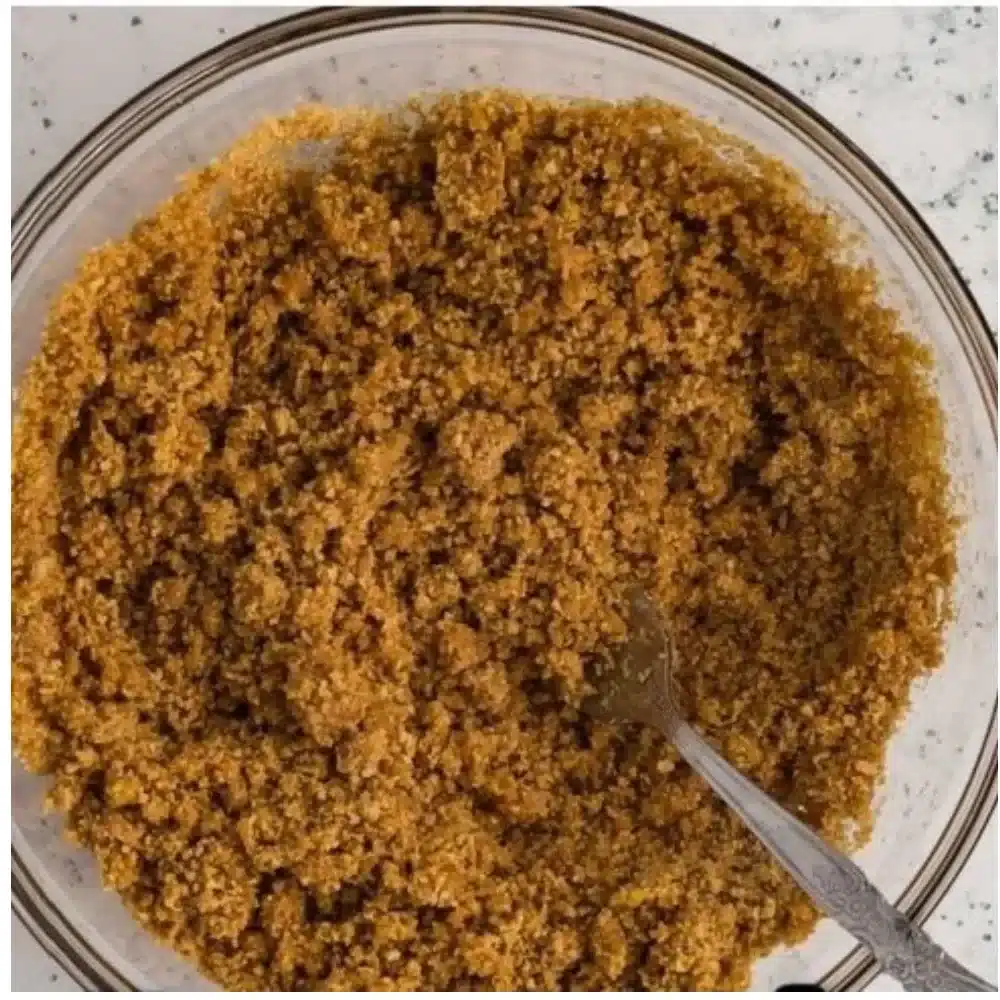
To begin crafting your Homemade Graham Cracker Crust, gather your ingredients and bring the comforting scent of nostalgia into your kitchen. Start by preheating your oven to a cozy temperature of three hundred fifty degrees Fahrenheit. In a large mixing bowl, combine one and a half cups of graham cracker crumbs with one third cup of sugar. As you mix the crumbs and sugar together, their sweet aroma fills the air, teasing your senses and hinting at the deliciousness to come.
Next, introduce half a cup of melted unsalted butter into the mixture. As you pour in the golden liquid, the crumbs absorb the butter, morphing into a crumbly texture that begs to be pressed into a pan. Using your fingers, work the mixture together until it feels like moist sand, a sensation that brings anticipation of the crust’s transformation.
Press the crumb mixture firmly into the bottom and up the sides of a pie or cheesecake pan, making sure to create an even layer that will hold the filling beautifully. As you compact the crumbs, enjoy the satisfying feeling under your fingertips. Bake in your preheated oven for eight to ten minutes, watching for a light golden hue that signifies perfection. When it emerges, it’ll have a slight crispness that promises to provide a textural delight. Allow the crust to cool completely before filling it with your favorite dessert.
Now that your kitchen smells amazing, let’s look at what you’ll need. You will need one and a half cups of graham cracker crumbs, one third cup of sugar, and half a cup of unsalted butter, melted. Freshness counts, so opt for high-quality ingredients for a crust that shines in every recipe.
- Preheat your oven to three hundred fifty degrees Fahrenheit.
- In a mixing bowl, combine one and a half cups of graham cracker crumbs with one third cup of sugar.
- Pour in half a cup of melted unsalted butter and mix until everything is well combined and crumbly.
- Press the buttery mixture firmly into the bottom and sides of your pie or cheesecake pan.
- Bake for eight to ten minutes or until the crust is golden and fragrant.
- Remove from the oven and let it cool completely before filling.
Troubleshooting Tip: If your crust seems too crumbly after baking, simply give it another light press with the back of a measuring cup while it is still warm. This will help tighten it up for a more stable and cohesive final product.
Why This Recipe Works (The Science)
The delightful flavor and texture of your Homemade Graham Cracker Crust come down to a few key elements in the ingredient balance and method. The combination of sugar, butter, and graham cracker crumbs creates a delightful caramelization during baking, which contributes to its rich and complex flavor profile. Each bite has a sweet, crispy crunch that perfectly complements creamy fillings.
Science Tip: The key to achieving that perfect texture lies in the melting of the butter. It acts as a binder, helping the crumbs stick together when pressed into the pan. This ensures that your crust holds its shape, providing a satisfying contrast to creamy or fruity fillings.
Expert Insight: Choosing a good quality graham cracker makes a remarkable difference in taste. Some store brands can be overly sweet or lack depth, so seek out ones made with whole grains for a more robust flavor. This crust’s versatility is what makes it foundational in the dessert world. Its adaptability allows you to use it with a variety of fillings while enhancing the overall experience.
From a nutritional standpoint, graham crackers are often made from whole wheat, providing a source of fiber that contributes to good digestion. Fiber helps maintain a healthy gut and can aid in maintaining a feeling of fullness after enjoying your dessert.
How to Serve Homemade Graham Cracker Crust
Once you’ve crafted your Homemade Graham Cracker Crust, the possibilities for serving become endless. Picture a luscious cheesecake nestled within the crust, topped with glistening berries or a rich chocolate ganache that oozes decadence. Each slice will reveal a gorgeous cross-section, the contrast between the creamy filling and the crisp crust inviting your guests to take that first delectable bite.
Alternatively, fill the crust with a silky lemon curd for a bright and refreshing dessert that sings with tartness against the sweet backdrop of the crust. The aroma of lemon combined with the graham cracker will evoke thoughts of sunny picnics and outdoor gatherings, creating a beautiful pairing of flavors.
Consider serving your crust filled with a chocolate mousse as a luxurious treat at a dinner party. The airy texture of the mousse balances the sturdy crust, while the flavors play harmoniously together, delighting your guests’ palates. Each serving is a celebration of flavor and texture that encourages sharing and laughter.
How to Store Homemade Graham Cracker Crust
If you find yourself with leftover crust or plan to make it ahead of time, storing it well ensures that its glorious flavor lingers. Once cooled, cover the crust with plastic wrap and store it at room temperature for up to three days. Its flavor deepens overnight, allowing it to mature and create even further deliciousness.
For refrigeration, you can keep the crust for up to one week in an airtight container. If you wish to save it longer, freezing is also an option. Wrap the crust securely in plastic wrap and place it in a freezer-friendly bag for up to three months. Remember, the texture may soften slightly upon thawing, but its exceptional flavor will still shine through.
Tips to Make Homemade Graham Cracker Crust
For those looking to elevate their Homemade Graham Cracker Crust even further, consider these helpful tips. Use freshly crushed graham crackers for a more robust flavor and a uniquely personal touch to your crust. If you’re seeking a hint of warmth, experiment by adding a pinch of cinnamon to the mixture.
For a touch of elegance, consider a splash of vanilla extract when mixing your ingredients. Adding this simple element will enhance the aroma while bringing a nice depth of flavor. Choosing high-quality butter can elevate your crust, harmonizing beautifully with the sweetness of the sugars.
If you’re looking to adjust the texture, feel free to add finely chopped nuts or coconut flakes for an extra dimension. The added crunch will provide delightful surprises in every bite. Save this recipe for your next cozy weekend dinner, where the warm atmosphere and delicious aromas will fill your home.
Variations and Substitutions
For those wishing to modify their Homemade Graham Cracker Crust, there are delightful ways to play with flavor and texture. If you are looking for a gluten-free option, try using gluten-free graham crackers or almond flour as a base while keeping the sugar and butter the same.
For those who love chocolate, swap in chocolate graham crackers for a richer and deeper profile. This variation adds a decadent touch to desserts like cream pies or layered trifle treats. You might even consider a spiced adaptation by incorporating finely ground ginger snaps, delivering a warm, aromatic flavor perfect for autumn gatherings.
In the mood for something refreshing? Use crushed vanilla wafers mixed with graham crackers for a delightful combination that pairs beautifully with fruity fillings like lemon or key lime. Each bite will remind you of sun-filled days and picnics.
FAQs
How can I make a vegan version of Homemade Graham Cracker Crust?
To create a vegan version of your Homemade Graham Cracker Crust, substitute the butter with coconut oil or another plant-based butter. Use a vegan sugar option, such as coconut sugar, for an equally delightful outcome.
Can I store the crust once it is filled?
Yes, you can store a filled crust in the refrigerator for up to three days, though be aware that the crust may soften slightly. To maintain the texture, keep any filling separate until ready to serve.
What can I use instead of graham cracker crumbs?
If you’re in a pinch, you can use crushed digestive biscuits, vanilla wafers, or even crushed pretzels for a unique twist on the traditional graham cracker crust.
How do I know when the crust is done baking?
Your crust will be perfectly baked when it turns a light golden color and emits a lovely aroma. Be sure to watch closely, as it can transition from golden to dark quickly.
How can I make a Homemade Graham Cracker Crust for a tart pan?
If you’re using a tart pan, simply follow the same instructions. Be sure to press evenly into the sides to ensure a crisp edge that will hold when releasing the tart.
People Also Ask
What is a Homemade Graham Cracker Crust made of?
A Homemade Graham Cracker Crust is typically made from graham cracker crumbs, sugar, and butter.
How long do I bake Homemade Graham Cracker Crust?
Bake your Homemade Graham Cracker Crust for eight to ten minutes at three hundred fifty degrees Fahrenheit until golden brown.
Is Homemade Graham Cracker Crust hard to make?
Not at all; making a Homemade Graham Cracker Crust is simple and requires just a few ingredients and minimal time.
Nutritional Information
Calories: One hundred fifty
Protein: Two grams
Carbohydrates: Twenty-one grams
Fat: Seven grams
Fiber: One gram
Vitamin D: Ten percent of daily value
Rich in fiber and naturally low in fat, this crust serves as a wholesome foundation for your favorite desserts while delivering delightful flavors.
Conclusion
Creating a Homemade Graham Cracker Crust is not just a cooking task; it is an act of love. Each step leads you closer to a masterpiece that captures the essence of family gatherings and shared joys. With its irresistible flavor and delightful texture, this crust is the perfect canvas for indulgent fillings, making every occasion special. Homemade Graham Cracker Crust will have a cherished spot in your recipe repertoire, inviting you to celebrate simple moments with every sweet bite. Sip slowly, breathe deeply, and let every bite remind you that wellness can be simple.
Homemade Graham Cracker Crust
Ingredients
Crust Ingredients
- 1.5 cups graham cracker crumbs Use freshly crushed for better flavor.
- 1/3 cup sugar Adjust based on sweetness preference.
- 1/2 cup unsalted butter, melted High-quality butter adds flavor.
Instructions
Preparation
- Preheat your oven to 350 degrees Fahrenheit.
- In a mixing bowl, combine graham cracker crumbs with sugar.
- Pour in melted unsalted butter and mix until combined and crumbly.
- Press the mixture firmly into the bottom and sides of a pie or cheesecake pan.
Baking
- Bake for 8 to 10 minutes, until the crust is golden and fragrant.
- Remove from the oven and let it cool completely before filling.