
Custom Decorated Cookies
There’s something truly magical about the process of baking Custom Decorated Cookies, where flour and sugar transform into sweet canvases awaiting artistic expression. These delightful treats are perfect for both everyday enjoyment and festive gatherings, and they bring with them an undeniable sense of nostalgia. Picture a cozy kitchen filled with the comforting aroma of vanilla and almond as you craft these sugar cookies, reminiscent of childhood memories spent with loved ones. I remember standing on a stool next to my grandmother, her gentle guidance turning a simple dough into vibrant, joyful artwork. You’ll love how simple yet satisfying it is to bring a bit of whimsy into your kitchen.
Prep Time:
Cook Time:
Total Time:
Servings:
Difficulty:
Key Ingredients:
Dietary Tags:
These Custom Decorated Cookies are a delightful way to unleash your creativity while enjoying the simple pleasure of baking.
Why Make This Recipe
Baking Custom Decorated Cookies is not just about the end product; it’s about the journey. The soft touch of the dough as you roll it into perfect balls, the sweet anticipation of waiting for them to bake until they are perfectly golden creates moments worth savoring. These cookies are incredibly versatile, allowing you to let your imagination run wild with icing, sprinkles, and colors that reflect any occasion. Every bite holds the sweet reward of your effort, and the unique flavors of almond and vanilla blend together beautifully, creating memories worth cherishing.
These cookies also foster a warm sense of togetherness as families gather to decorate them, sharing laughter and love as they customize their creations. The process might remind you of childhood experiences, decorating cookies with parents or friends’ sleepovers. There’s an undeniable feeling of joy that accompanies each cookie crafted and every detail perfected, turning baking into a cherished tradition. It’s the kind of recipe you’ll come back to all year long.
How to Make Custom Decorated Cookies
To start, preheat your oven to three hundred seventy-five degrees Fahrenheit. As your kitchen warms with comforting heat, take a small bowl and combine two and three-fourths cups of all-purpose flour, one teaspoon of baking soda, and half a teaspoon of baking powder. The scent of fresh flour combines with the homespun aroma of baking powder, creating a cozy atmosphere.
In a large bowl, cream together one cup of unsalted butter, softened to room temperature, and one and a half cups of white sugar until smooth and fluffy, resembling a soft cloud. Beat in one egg, one teaspoon of vanilla extract, and half a teaspoon of almond extract, infusing the mixture with sweet, fragrant notes. Gradually blend in the dry ingredients, watching as the dough comes together, thick and smooth between your fingers.
Roll rounded teaspoonfuls of dough into soft balls, placing them onto ungreased cookie sheets. Here’s where the magic begins—flatten each ball with a fork, creating a crisscross pattern that evokes a sense of homemade charm. Bake them for eight to ten minutes in your preheated oven, or until they emerge beautifully golden, their aroma inviting anyone nearby to the kitchen. Allow the cookies to cool on wire racks, filling the air with the sweet scent of freshly baked treats.
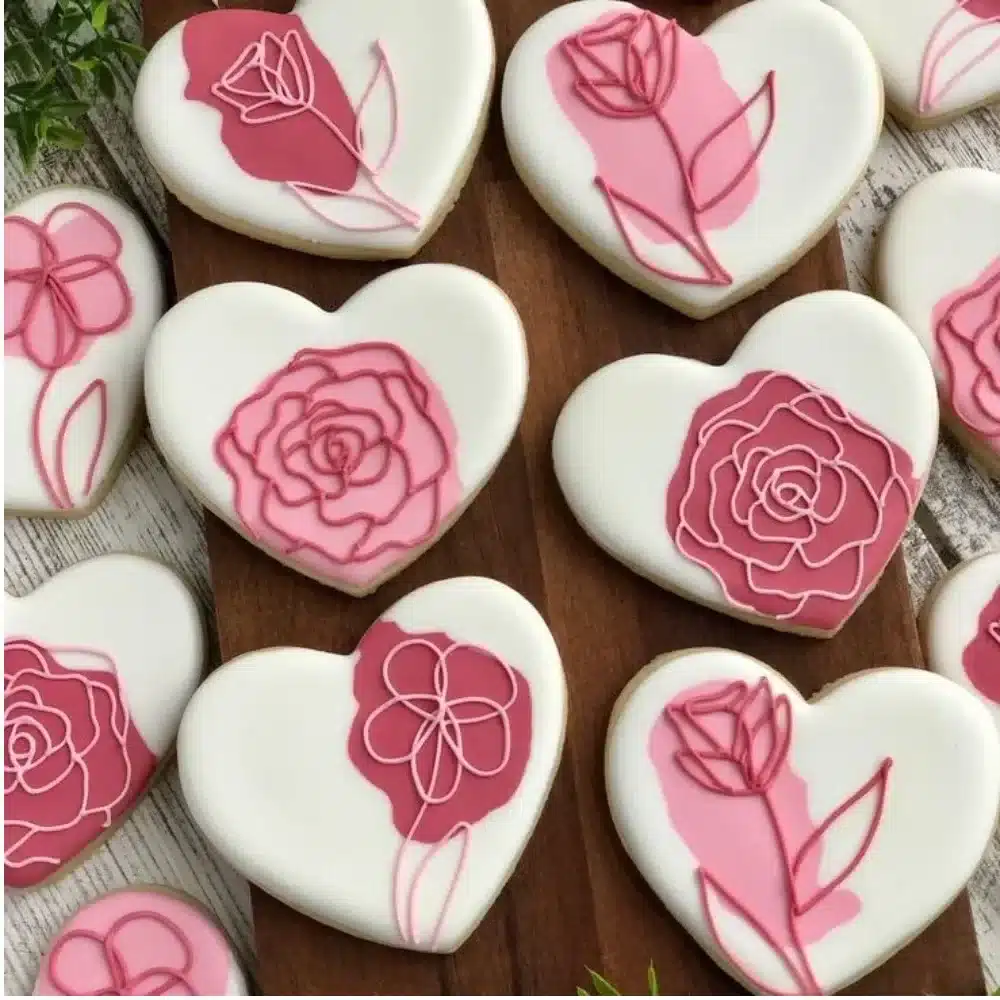
For decorating, mix three to four cups of confectioners’ sugar with two tablespoons of meringue powder and just enough water to reach your desired consistency. The fluffy white icing can be tinted with food coloring, transforming plain cookies into colorful masterpieces. Once cooled, let your creativity flow as you decorate your cookies with vibrant icing that spreads like joy across each surface. Now that your kitchen smells amazing, let’s look at what you’ll need.
Two and three-fourths cups of all-purpose flour, one teaspoon of baking soda, half a teaspoon of baking powder, one cup of unsalted butter, softened, one and a half cups of white sugar, one egg, one teaspoon of vanilla extract, half a teaspoon of almond extract, three to four cups of confectioners’ sugar, two tablespoons of meringue powder, water for consistency, and food coloring, if desired, are all essential ingredients in creating these Custom Decorated Cookies. Always ensure the ingredients are fresh for the best results.
Preheat your oven to three hundred seventy-five degrees Fahrenheit. In a small bowl, stir together the flour, baking soda, and baking powder, setting this mixture aside for later. In a large bowl, cream together the butter and sugar until smooth; the mixture should feel light and airy. Beat in the egg, vanilla extract, and almond extract, letting those lovely aromas envelop you as you work. Gradually blend in the dry ingredients until just combined. Roll rounded teaspoonfuls of dough into balls and place them onto ungreased cookie sheets, creating space between each one for even baking. Flatten each ball gently with a fork, forming that delightful crisscross pattern. Bake for eight to ten minutes, or until golden, letting the scent wrap around you as they cool on wire racks.
For decorating, mix the confectioners’ sugar and meringue powder in a large bowl, adjusting with water until the icing reaches a silky consistency. Divide mixture into smaller bowls and tint with food coloring, reflecting your mood and the occasion. When the cookies are cool, let your creativity shine as you skillfully pipe the icing onto each cookie, transforming them into delightful works of art.
Why This Recipe Works (The Science)
The method behind these Custom Decorated Cookies ensures an unbeatable texture you will fall in love with. The combination of baking soda and baking powder provides the perfect lift, creating cookies that are tender yet firm enough to hold their shape, making them ideal for decorating. The key here is achieving the right balance—too much leavening can make them puffy, while too little leaves you with flat disappointments.
Science Tip: The role of baking powder activates in the oven heat, creating tiny air pockets that make the cookies light and airy.
Expert Insight: Using softened butter instead of melted ensures the proper incorporation of air into your dough, leading to those decadent, soft cookies we’re all after. By creaming the butter and sugar adequately, you set the stage for a lovely texture that’s both crispy and chewy, offering the best of both worlds.
Additionally, the nutrient benefits can’t be overlooked. Each cookie contains a healthy dose of energy, perfect for those long afternoons where focus is key. And don’t forget that the essential vitamins derived from eggs support skin health and provide a boost to your overall well-being.
How to Serve Custom Decorated Cookies
When it comes to serving your Custom Decorated Cookies, there’s no limit to the joy they bring. Imagine them displayed on a vibrant platter at holiday gatherings, each cookie a unique burst of color and creativity, inviting guests to indulge. Pair these cookies with a warm cup of tea or a rich glass of milk, enhancing the sweetness with the soothing warmth of your favorite beverage, creating a delightful contrast.
For a festive occasion, stack them in a lovely jar tied with a ribbon, transforming them into heartfelt gifts that spread happiness. Each cookie becomes more than just a treat; it signifies time spent together and memories made. Whether it’s a birthday celebration or a cozy evening with family, these cookies always fit the mood and bring people closer.
How to Store Custom Decorated Cookies
To keep your Custom Decorated Cookies delightful and fresh, store them in an airtight container at room temperature where they will stay soft for several days. If you happen to have leftovers, feel free to refrigerate them for up to two weeks, allowing the flavors to deepen beautifully overnight.
For longer storage, these cookies can be frozen safely for up to three months. When you are ready to enjoy them again, simply let them sit at room temperature. The artistry of the icing may slightly change, but the flavor remains vibrant and as delicious as the day they were made.
Tips to Make Custom Decorated Cookies
Creating your own Custom Decorated Cookies can be incredibly fun and rewarding with a few simple tips. First and foremost, ensure your butter is perfectly softened to achieve that creamy blend and optimal texture. Use quality extracts for enhanced flavor; they pack a punch that elevates the overall experience. When rolling the dough, keep your hands lightly floured to prevent sticking, making the process smoother and more enjoyable.
Consider customizing the icing by incorporating natural extracts or flavorings beyond vanilla; almond or even maple can add delightful depth. The best part of these Custom Decorated Cookies is the opportunity for creativity; let your imagination guide you as you decorate according to season or occasion. Save this recipe for your next cozy weekend dinner.
Variations and Substitutions
If you’re looking to explore different flavor profiles, try infusing your cookie dough with freshly grated zest from oranges or lemons for a bright citrus twist. Consider substituting half of the all-purpose flour with almond flour for a nutty, gluten-friendly version of these Custom Decorated Cookies.
To cater to dietary preferences, use coconut oil instead of butter for a dairy-free alternative without sacrificing taste. As the seasons change, think about incorporating seasonal spices like cinnamon or nutmeg into your recipe for those autumn delights. Finally, why not create a chocolate version? Substitute a third of the flour for cocoa powder for a rich, indulgent take sure to impress.
FAQs
What are Custom Decorated Cookies?
Custom Decorated Cookies are delightful sugar cookies that are not only soft and buttery but also offer a blank canvas for creative decoration. You can customize these cookies using colorful icing, sprinkles, and edible decorations to fit any occasion.
Can I make Custom Decorated Cookies without eggs?
Yes, you can substitute eggs in this recipe. A popular alternative is one-quarter cup of unsweetened applesauce or a flaxseed meal mixture, which can yield similar results in both texture and flavor.
How can I get the icing to have a glossy finish?
For a glossy icing finish, ensure you mix the meringue powder and confectioners’ sugar thoroughly and add just enough water for a smooth consistency. Let your decorated cookies sit for a brief moment so that the glaze can settle perfectly.
How should I store the decorated cookies?
Store your decorated cookies in an airtight container at room temperature. For extended freshness, you can refrigerate or freeze them, allowing you to enjoy them at a later time while preserving their delicious taste.
How do I make my Custom Decorated Cookies more colorful?
To achieve vibrant hues, choose high-quality gel food colorings that won’t alter your icing consistency. Add colors gradually until your desired shade is reached; you will love how magnificent your creations turn out!
People Also Ask
What is the best way to decorate cookies naturally?
Using natural ingredients like fruit purees, beet juice, or turmeric can create beautiful colors without added dyes.
How long do decorated cookies last?
When stored properly, decorated cookies can last about one week at room temperature or longer when refrigerated or frozen.
Nutritional Information
Calories: two hundred
Protein: two grams
Carbs: thirty-four grams
Fat: eight grams
Fiber: zero grams
Vitamin: Calcium
Rich in fiber and naturally low in fat, these cookies not only provide a delectable treat but also add a little nutrition to the joy of baking.
Conclusion
In crafting your Custom Decorated Cookies, you engage in a time-honored tradition infused with creativity and love. Each cookie is a testament to your enjoyment of baking and the delightful moments shared with family and friends. As you enjoy them, savor the flavors and textures, creating lasting memories. Sip slowly, breathe deeply, and let each cookie remind you of the joy that simplicity brings.

Custom Decorated Cookies
Ingredients
Cookie Dough Ingredients
- 2.75 cups All-purpose flour Ensure the flour is fresh for best results.
- 1 teaspoon Baking soda
- 0.5 teaspoon Baking powder
- 1 cup Unsalted butter, softened Use softened butter for better texture.
- 1.5 cups White sugar
- 1 large Egg
- 1 teaspoon Vanilla extract
- 0.5 teaspoon Almond extract
Icing Ingredients
- 3-4 cups Confectioners’ sugar
- 2 tablespoons Meringue powder
- Water Add just enough to reach desired consistency.
- Food coloring, if desired
Instructions
Preparation
- Preheat your oven to 375°F (190°C).
- In a small bowl, combine flour, baking soda, and baking powder; set aside.
- In a large bowl, cream together the softened butter and sugar until smooth and fluffy.
- Beat in the egg, vanilla extract, and almond extract.
- Gradually blend in the dry ingredients until just combined.
Baking
- Roll rounded teaspoonfuls of dough into balls and place them onto ungreased cookie sheets.
- Flatten each ball gently with a fork to create a crisscross pattern.
- Bake for 8-10 minutes or until golden.
- Allow cookies to cool on wire racks.
Icing
- In a large bowl, mix confectioners’ sugar and meringue powder, adjusting with water until reaching desired icing consistency.
- Divide icing into smaller bowls and tint with food coloring as desired.
- Once cookies are cool, decorate them with the icing.